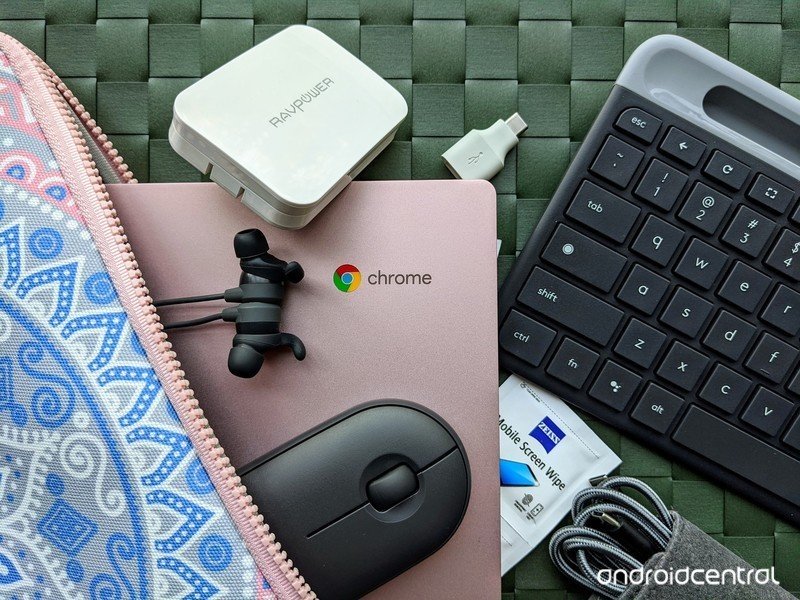
An external mouse isn't just an accessory for your Chromebook; it's a productivity game-changer. While the built-in trackpad is perfectly functional for everyday browsing, connecting and using an external mouse with a Chromebook can unlock new levels of precision, comfort, and speed, transforming how you interact with your device for everything from detailed spreadsheet work to graphic design or even casual gaming. It's about empowering you with more control, making those long work sessions less taxing on your hands and vastly improving navigation.
Think of it as upgrading from a compact car to a performance vehicle – both get you there, but one offers a smoother, more controlled, and enjoyable ride for certain journeys.
At a Glance: Your Quick Guide to External Mice on Chromebook
- Plug & Play Simplicity: Most wired mice and those with USB receivers are instantly recognized by your Chromebook.
- Wireless Freedom: Bluetooth mice offer ultimate cable-free convenience but require a quick pairing process.
- Customization is Key: Easily adjust cursor speed and acceleration in your Chromebook's settings.
- Troubleshooting Made Easy: Common issues like non-responsive cursors or pairing problems often have simple fixes.
- Enhance Productivity: An external mouse provides superior precision and comfort compared to a trackpad for many tasks.
Why Ditch the Trackpad? The Case for an External Mouse on Chromebook
Your Chromebook's trackpad is a marvel of compact engineering, perfectly adequate for scrolling through web pages or tapping out emails. However, for tasks demanding finer control or extended use, an external mouse steps in as the undisputed champion. It's not just a matter of preference; it's about optimizing your workflow and reducing strain.
Precision at Your Fingertips: Imagine editing photos, meticulously selecting cells in a spreadsheet, or drawing intricate designs. The trackpad, with its inherent limitations, can feel clunky and imprecise. An external mouse offers pixel-perfect control, allowing you to navigate menus, select text, and manipulate objects with surgical accuracy. This precision dramatically cuts down on misclicks and frustration.
Ergonomic Comfort for the Long Haul: Spending hours hunched over a laptop, constantly swiping and tapping on a flat trackpad, can lead to discomfort in your wrists and shoulders. An ergonomically designed external mouse, whether a traditional shape or a vertical variant, allows your hand to rest in a more natural position, significantly reducing the risk of repetitive strain injuries. For anyone who uses their Chromebook for more than an hour or two daily, this comfort isn't a luxury—it's a necessity.
Speed and Efficiency Unleashed: Beyond comfort and precision, an external mouse simply makes you faster. The fluid motion of gliding a mouse across a surface and executing quick clicks or scrolls often outperforms trackpad gestures in terms of raw speed. This efficiency adds up, saving you precious minutes throughout your day, whether you're managing files, switching between tabs, or diving deep into applications.
Understanding Your Options: Wired vs. Wireless Mice
Before you connect, it's helpful to know the main types of external mice compatible with your Chromebook. Each offers distinct advantages, catering to different needs and preferences.
The Simplicity of Wired USB Mice
The wired mouse is the veteran of the computing world, and for good reason: it’s incredibly straightforward. These mice connect directly to your Chromebook via a USB cable, typically a USB-A plug. Some newer Chromebooks might lean towards USB-C ports, in which case you might need a simple USB-C to USB-A adapter.
Key Advantages:
- Plug-and-Play: No batteries, no pairing, just plug it in and it works.
- Reliable Connection: A physical connection means no signal interference or dropouts.
- No Charging: Ever. It draws power directly from your Chromebook.
If you value simplicity, reliability, and don't mind a cable, a wired USB mouse is an excellent, no-fuss choice.
The Freedom of Wireless Mice
For those who detest cable clutter and crave a cleaner workspace, wireless mice are the go-to. They come in two main flavors, each with its own connection method.
Wireless Mouse with a USB Receiver
Many wireless mice come with a tiny USB dongle, often called a receiver or transceiver. This small device plugs into a USB port on your Chromebook and acts as a bridge between your mouse and the computer. The mouse typically communicates with this receiver using 2.4 GHz radio frequency technology.
Key Advantages:
- Reliable Wireless: Generally offers a stable and responsive connection.
- Ease of Use: Still largely plug-and-play once the receiver is connected.
- Portability: The receiver is small and often can be stored inside the mouse itself.
These are a fantastic middle ground, offering wireless convenience with minimal setup fuss, provided you have an available USB-A port for the receiver.
Wireless Bluetooth Mouse
Bluetooth mice are the epitome of wireless convenience. They connect directly to your Chromebook's built-in Bluetooth radio, meaning no USB receiver is required, freeing up a valuable USB port.
Key Advantages:
- No Dongle Required: Keep all your USB ports open.
- Clean Setup: Truly cable-free and clutter-free.
- Multi-Device Potential: Many Bluetooth mice can pair with multiple devices and switch between them.
The only trade-off is a slightly more involved initial pairing process compared to the plug-and-play options, and you’ll need to ensure your Chromebook’s Bluetooth is enabled.
Connecting Your Mouse: Step-by-Step Guides
No matter which type of external mouse you choose, connecting it to your Chromebook is a straightforward process. Let's walk through each scenario.
Instant Connection: Wired USB Mouse
This is the easiest setup imaginable. If you want to get going in seconds, this is your route.
- Locate an Available USB Port: Look for a rectangular USB-A port on the sides of your Chromebook. Many newer models also feature USB-C ports, which are smaller and oval-shaped. If your mouse has a USB-A connector and your Chromebook only has USB-C, you'll need a USB-C to USB-A adapter or hub.
- Plug In the Mouse: Firmly insert the mouse's USB connector into the chosen USB port. It should only fit one way.
- Watch for the Cursor: Your Chromebook should immediately detect the new input device. Within moments, a cursor (usually an arrow) will appear on your screen, ready for action.
- Test for Functionality: Move the mouse around to ensure the cursor tracks correctly. Click the left and right buttons, and try scrolling the wheel if your mouse has one.
That's it! Your wired mouse is now ready to use.
Easy Setup: Wireless Mouse with a USB Receiver
This method combines the convenience of wireless operation with a nearly plug-and-play experience.
- Find the USB Receiver: This is usually a tiny black or silver dongle that comes packed with your wireless mouse. It's often found in the mouse's battery compartment or tucked into a slot on the packaging.
- Plug the USB Receiver into a Port: Insert the USB receiver into any available USB-A port on your Chromebook. Again, if your Chromebook only has USB-C ports, you'll need an adapter.
- Ensure Mouse Power:
- Install Batteries: If your mouse requires disposable batteries (AA or AAA), insert fresh ones according to the polarity markings inside the battery compartment.
- Turn On the Mouse: Locate the power switch on the bottom or side of the mouse and slide it to the "On" position. An LED indicator light might briefly flash to confirm it's powered.
- Verify Connection: Your Chromebook should automatically detect the receiver and, subsequently, the mouse. Move the mouse, click the buttons, and scroll to confirm it's working.
You're now free from cables, with a responsive wireless mouse at your command.
Pairing Up: Wireless Bluetooth Mouse
Connecting a Bluetooth mouse offers the ultimate cable-free experience, as it leverages your Chromebook's internal wireless capabilities, saving precious USB ports. The process involves two main steps: enabling Bluetooth on your Chromebook and then initiating the pairing on both devices.
- Enable Bluetooth on Your Chromebook:
- Click on the status area (the clock and battery icon) located in the bottom right corner of your Chromebook screen. This opens the Quick Settings panel.
- Look for the Bluetooth icon (it often looks like a stylized 'B'). If it's greyed out or says "Bluetooth off," click on it to toggle it on. It should turn blue or display "Bluetooth on."
- Once on, click the small arrow next to the Bluetooth icon, or click the settings gear icon in the Quick Settings panel and navigate to the "Bluetooth" section under "Connected devices" to open the detailed Bluetooth settings.
- Prepare the Mouse for Pairing:
- Check Batteries: Ensure your Bluetooth mouse has fresh batteries installed or is sufficiently charged.
- Power On: Turn on the mouse using its power switch, typically located on the bottom.
- Activate Pairing Mode: This is the crucial step. Most Bluetooth mice have a dedicated pairing button, often small and recessed, on the bottom. Press and hold this button for a few seconds until an LED light on the mouse starts to blink rapidly. This indicates it's in discoverable or pairing mode, ready to be found by other devices. Consult your mouse's manual if you can't locate this button or light.
- Pair the Mouse with Your Chromebook:
- Back on your Chromebook's Bluetooth settings screen, click on "Pair new device."
- Your Chromebook will begin scanning for nearby Bluetooth devices in pairing mode. After a few moments, your mouse's name (e.g., "Logitech MX Master 3," "Microsoft Bluetooth Mouse") should appear in the list of available devices.
- Click on your mouse's name in the list. The Chromebook will attempt to establish a connection.
- Follow any on-screen prompts. Occasionally, you might be asked to confirm a passcode or press a specific button on the mouse, though this is rare for standard mice.
- Once connected, the mouse's LED light will usually stop blinking and remain solid or turn off, and its status on the Chromebook will change to "Connected."
Once connected, your external mouse will seamlessly take over navigation. For example, performing actions like a simple left-click on your Chromebook becomes intuitive and immediate, freeing you from the trackpad's gestures and offering a more traditional desktop experience.
Fine-Tuning Your Experience: Customizing Mouse Settings
Connecting your mouse is just the first step. To truly make it feel like an extension of your hand, you'll want to dive into your Chromebook's settings and customize its behavior. Chrome OS offers a few key adjustments that can significantly impact your user experience.
Accessing Device Settings
All mouse customization options are neatly organized within your Chromebook's main settings.
- Click on the status area (bottom right, where the clock and battery are).
- Select the Settings icon (the gear symbol).
- In the Settings window, scroll down and click on the "Device" section in the left-hand menu.
- Under "Device," you'll find a subsection labeled "Mouse and touchpad." Click on this to reveal your customization options for both internal and external pointing devices.
Adjusting Cursor Speed
The default cursor speed might feel too slow or too fast for your liking. Fortunately, changing it is quick and easy.
- Within the "Mouse and touchpad" settings, locate the "Mouse speed" slider.
- Drag the slider to the left to decrease the cursor's movement speed (making it less sensitive) or to the right to increase it (making it more sensitive).
- Test the new speed by moving your mouse around the screen. You'll likely find a "sweet spot" that feels natural and efficient for your workflow.
A faster speed is often preferred by power users, allowing them to traverse the screen quickly with minimal physical mouse movement, while a slower speed can offer greater precision for detailed tasks.
Understanding Mouse Acceleration
Mouse acceleration is a feature that adjusts your cursor's speed based on how quickly you move your physical mouse. If you move the mouse slowly, the cursor moves a short distance. If you flick the mouse quickly, the cursor covers a much larger distance.
- In the "Mouse and touchpad" settings, you'll see a toggle for "Enable mouse acceleration."
- When to Enable: Mouse acceleration can be useful for general browsing and everyday tasks, as it allows for both precise small movements and quick large movements without constantly lifting your mouse.
- When to Disable: Many users, especially those involved in precise work like graphic design, CAD, or competitive gaming, prefer to disable mouse acceleration. When disabled, the cursor always moves a consistent distance on the screen relative to the physical distance your mouse moves, regardless of speed. This provides a more predictable and consistent "muscle memory" for accurate movements.
Experiment with this setting to see what feels best for your personal usage habits. There's no single "right" answer; it's entirely down to your comfort and precision needs.
Troubleshooting Common Mouse Issues
Even the most reliable tech can have its moments. If your external mouse isn't behaving as expected, don't fret. Most common issues have straightforward solutions. Here's a guide to diagnosing and fixing problems.
The Cursor is Missing or Mouse Isn't Responding
This is arguably the most common and frustrating issue, but it's often the easiest to fix.
- Check the Connection (Wired Mice): Ensure the USB cable is securely plugged into the Chromebook's USB port. Try disconnecting and reconnecting it.
- Try a Different USB Port (Wired & USB Receiver Mice): Sometimes a specific port might be faulty. Plug your mouse or its receiver into another available USB port on your Chromebook.
- Restart Your Chromebook: A simple restart can often resolve minor software glitches that prevent hardware from being recognized.
- Check Batteries/Power (Wireless Mice): This is a prime suspect for wireless mice. Ensure batteries are fresh and correctly inserted, or that your rechargeable mouse is adequately charged. Also, confirm the mouse's power switch is in the "On" position.
- Verify Bluetooth is Enabled (Bluetooth Mice): Double-check that Bluetooth is toggled "On" in your Chromebook's Quick Settings panel.
Laggy or Skipping Cursor? Here's Why
If your cursor is jumping, stuttering, or not keeping up with your movements, the problem usually lies with the connection or the mouse itself.
- Check Batteries (Wireless Mice): Low batteries are a frequent cause of erratic wireless mouse behavior. Replace them or recharge the mouse.
- Reduce Distance and Obstacles (Wireless Mice): For wireless mice (especially those with USB receivers), ensure there's a clear line of sight and close proximity between the mouse and the receiver/Chromebook. Keep other electronic devices that could cause interference (like Wi-Fi routers or cordless phones) away from the mouse's path.
- Use a Smooth, Clean Surface: Optical and laser mice rely on reflecting light off the surface. A dirty, reflective, or uneven surface can confuse the sensor. Use a good quality mousepad or a clean, non-glossy desk surface.
- Clean the Mouse Sensor: Dust or debris can accumulate on the mouse's optical or laser sensor on the bottom. Gently clean it with a cotton swab or a soft cloth.
- Try a Different Surface/Mousepad: If the surface is the issue, a different one might instantly improve performance.
Bluetooth Pairing Headaches
Bluetooth can sometimes be finicky, but persistence usually pays off.
- Ensure Bluetooth is Enabled on Chromebook: As mentioned before, make absolutely sure the Bluetooth toggle is on in Quick Settings.
- Restart Your Chromebook: This can clear any lingering Bluetooth service issues.
- Remove and Re-Pair the Mouse: If the mouse was previously paired but isn't connecting, go to
Settings > Device > Bluetooth. Find your mouse in the "Paired devices" list, click the three-dot menu next to it, and select "Forget." Then, try the pairing process again from scratch (Step 2 & 3 in the "Pairing Up: Wireless Bluetooth Mouse" section). - Confirm Mouse is in Pairing Mode: This is critical. Many users forget to put their mouse into active pairing/discoverable mode. Hold down the pairing button on the mouse until its LED blinks rapidly.
- Interference: High density of other Bluetooth or Wi-Fi devices in the immediate vicinity can sometimes cause issues. Try pairing in a different location.
Buttons Not Clicking or Scrolling
If the cursor moves but the buttons or scroll wheel are unresponsive, consider these points.
- Check Mouse Button Settings: While less common on Chromebooks than on Windows/macOS, it's worth a quick check. Go to
Settings > Device > Mouse and touchpad. Ensure no unusual settings are enabled that might be affecting button behavior. - Try a Different Mouse: If possible, test another mouse on your Chromebook. This helps determine if the issue is with your original mouse or the Chromebook itself.
- Clean the Mouse Buttons/Scroll Wheel: Sometimes, dirt, dust, or sticky residue can get lodged under buttons or within the scroll wheel mechanism, preventing them from registering clicks or rotations. Use compressed air or a fine brush to clear any debris.
When All Else Fails: General Tips
If none of the above solutions work, these broader troubleshooting steps might help.
- Update Chrome OS: Ensure your Chromebook is running the latest version of Chrome OS. Google frequently releases updates that include bug fixes and improved hardware compatibility. Go to
Settings > About Chrome OS > Check for updates. - Consult the Mouse Manual: Your specific mouse model might have unique troubleshooting steps or software (though mouse software is less common for Chromebooks).
- Test on Another Device: If you have access to another computer (Windows PC, Mac, or even another Chromebook), try connecting your mouse to it. If it works there, the issue is likely with your Chromebook. If it doesn't work, your mouse might be faulty.
Beyond the Standard: Exploring Other Navigation Tools
While external mice are fantastic, they're not the only way to navigate your Chromebook. Depending on your needs, other pointing devices might offer a more specialized or comfortable experience.
The Ever-Present Trackpad
Your Chromebook's built-in trackpad is an incredibly versatile tool, especially when you master its multi-touch gestures. It's always there, requires no extra accessories, and is perfect for on-the-go productivity.
Benefits:
- Portability: Always integrated, no extra gear to carry.
- Gestures: Supports multi-finger gestures for scrolling, zooming, switching tabs, and more, offering a powerful way to interact with Chrome OS without lifting your fingers.
- Space-Saving: Requires no external surface.
For quick tasks, tight spaces, or simply when you don't want to carry an extra device, the trackpad remains an excellent fallback and primary input method for many.
Trackball Mice: A Different Kind of Control
A trackball mouse is a unique alternative that offers precision control without requiring you to move the entire device. Instead, you roll a ball with your thumb or fingers to move the cursor.
Benefits:
- Reduced Hand Movement: Excellent for ergonomics, as only your fingers move, not your wrist or arm.
- Space-Saving: Since the mouse doesn't move, it requires very little desk space, making it ideal for cramped workstations.
- Precision: Allows for very fine cursor control once you get used to it.
Trackballs are often favored by users with wrist pain or those who work in tight areas where traditional mouse movement is restricted.
Stylus Pens: Precision for Artistic Chromebooks
For compatible Chromebooks that feature a touchscreen and stylus support (often referred to as USI pens), a stylus can offer a completely different level of interaction, especially for creative or note-taking tasks.
Benefits:
- Natural Input: Feels like writing or drawing on paper.
- Detailed Work: Perfect for sketching, drawing, annotating documents, or precise selections on a touchscreen.
- Signature Capture: Easily sign digital documents.
If you have a 2-in-1 Chromebook with a touchscreen, a stylus pen can transform it into a powerful digital notebook or art tablet, complementing or even replacing mouse input for specific activities.
Your Next Steps: Elevating Your Chromebook Workflow
Integrating an external mouse with your Chromebook is a simple yet powerful upgrade. You've now got the knowledge to choose the right type, connect it seamlessly, customize its settings to your liking, and troubleshoot any bumps along the way.
The newfound precision, comfort, and speed that an external mouse provides can significantly enhance your daily productivity, reduce fatigue during long work sessions, and even make your favorite Chromebook games more enjoyable. Don't underestimate the impact of a simple peripheral on your overall computing experience.
Take a moment to experiment with the mouse speed and acceleration settings to find what truly feels intuitive for you. Your Chromebook is a versatile machine, and by personalizing your input methods, you're unlocking its full potential, one precise click at a time. Enjoy the smoother, more controlled journey ahead!